How to Resize an Image While Keeping Its Proportions
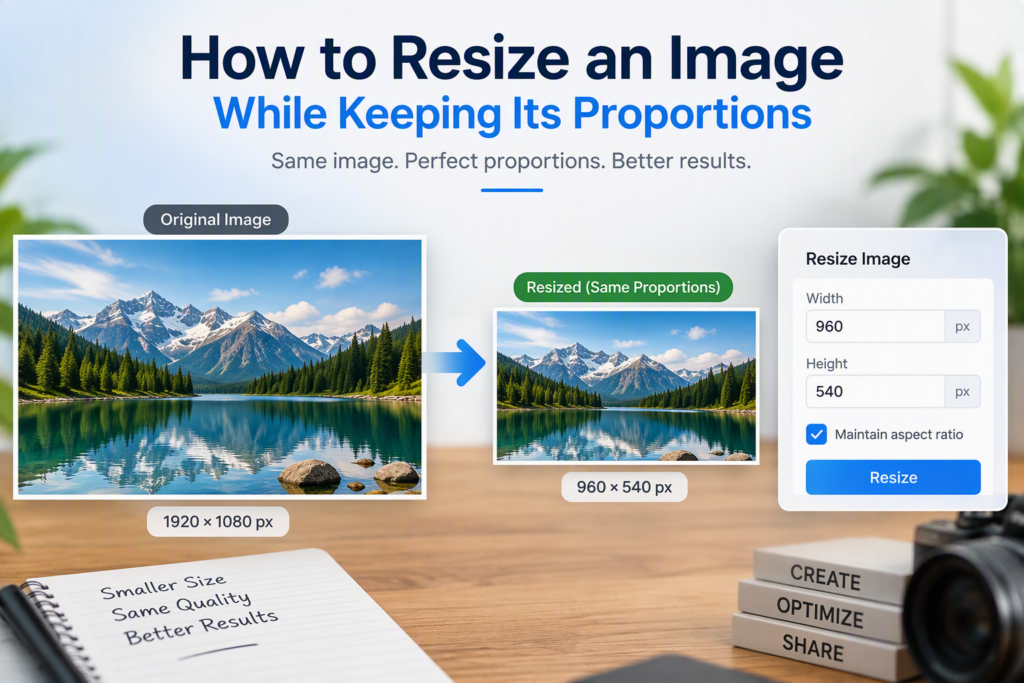
Resizing an image without distorting it is simple once you understand one rule: maintain the original aspect ratio. The aspect ratio is the relationship between an image’s width and height. If you change one dimension and let the other adjust automatically, the image stays proportional and avoids looking stretched or squashed.
Whether you’re preparing photos for a website, social media post, presentation, online store, or document, knowing how to resize images correctly helps preserve quality and maintain a professional appearance.
What Does It Mean to Keep an Image’s Proportions?
An image’s proportions are defined by its aspect ratio.
For example:
- 1920 × 1080 pixels = 16:9 aspect ratio
- 1200 × 800 pixels = 3:2 aspect ratio
- 1080 × 1080 pixels = 1:1 aspect ratio
When you resize an image while keeping its proportions, both dimensions change at the same rate. This prevents distortion.
Correct Example
Original image:
- Width: 2000 px
- Height: 1000 px
Resize to:
- Width: 1000 px
- Height: 500 px
The image remains properly proportioned because both dimensions were reduced by 50%.
Incorrect Example
Original image:
- Width: 2000 px
- Height: 1000 px
Resize to:
- Width: 1000 px
- Height: 800 px
The image becomes stretched vertically because the aspect ratio changed.
Why Maintaining Proportions Matters
Keeping image proportions is important for several reasons.
Preserves Visual Quality
Distorted images look unprofessional and can make subjects appear wider, thinner, taller, or shorter than intended.
Improves User Experience
Visitors expect photos, graphics, and product images to display naturally. Stretched images can reduce trust and negatively affect engagement.
Supports Consistent Branding
Businesses and content creators often use logos, banners, and promotional graphics. Maintaining proportions ensures brand assets appear consistent across platforms.
Protects Important Details
Improper resizing may make text difficult to read or visual elements appear unnatural.
Understanding Aspect Ratio
Before resizing an image, it helps to understand how aspect ratios work.
Aspect ratio is expressed as width:height.
Common aspect ratios include:
| Aspect Ratio | Common Use |
|---|---|
| 1:1 | Profile pictures, Instagram posts |
| 4:3 | Traditional cameras and presentations |
| 3:2 | DSLR photography |
| 16:9 | Videos, YouTube thumbnails, screens |
| 9:16 | Mobile stories and short videos |
The actual pixel dimensions can vary while maintaining the same ratio.
For example:
- 1600 × 900
- 1280 × 720
- 1920 × 1080
All use a 16:9 aspect ratio.
How to Resize an Image While Keeping Its Proportions
The simplest method is to change only one dimension and let software calculate the other automatically.
Method 1: Enter a New Width
Suppose your original image is:
- Width: 3000 px
- Height: 2000 px
You want the width to become 1500 px.
Calculate the scale factor:
1500 ÷ 3000 = 0.5
Apply the same factor to the height:
2000 × 0.5 = 1000
New dimensions:
- Width: 1500 px
- Height: 1000 px
The proportions remain unchanged.
Method 2: Enter a New Height
If the new height is your target dimension:
Original image:
- Width: 3000 px
- Height: 2000 px
Desired height:
- 800 px
Scale factor:
800 ÷ 2000 = 0.4
New width:
3000 × 0.4 = 1200
New dimensions:
- Width: 1200 px
- Height: 800 px
Again, the image stays proportional.
Using the Aspect Ratio Lock
Most image editing tools include a feature called:
- Lock Aspect Ratio
- Maintain Aspect Ratio
- Constrain Proportions
- Keep Original Ratio
When enabled, changing either width or height automatically updates the other value.
This is the easiest and safest way to resize images.
Look for a:
- Chain icon
- Lock icon
- Linked width and height fields
If these fields are connected, proportions will remain intact.
Resizing Images Online
Online image-resizing tools are often the fastest solution because they automatically preserve image proportions.
The typical process is:
- Upload your image.
- Enter a new width or height.
- Ensure “Maintain Aspect Ratio” is enabled.
- Preview the image.
- Download the resized version.
This method works well for:
- Blog images
- E-commerce product photos
- Social media graphics
- Website uploads
- Email attachments
Resizing Images in Windows
Windows provides several ways to resize images.
Microsoft Paint
- Open the image in Paint.
- Select Resize.
- Choose percentage or pixel mode.
- Check Maintain Aspect Ratio.
- Enter the new width or height.
- Save the image.
Paint automatically calculates the corresponding dimension when aspect ratio is maintained.
Photos App
Some versions of the Photos app include built-in resize options.
- Open the image.
- Select resize or export options.
- Choose a predefined size or custom dimensions.
- Save the resized copy.
Resizing Images on Mac
Preview, included with macOS, makes proportional resizing straightforward.
- Open the image in Preview.
- Click Tools.
- Choose Adjust Size.
- Enable proportional scaling.
- Enter a new width or height.
- Save the image.
The software automatically updates the second dimension.
Resizing Images in Adobe Photoshop
Photoshop offers advanced control while preserving image quality.
Steps
- Open the image.
- Go to Image > Image Size.
- Ensure the chain link icon is active.
- Enter a new width or height.
- Confirm the resolution settings.
- Click OK.
Photoshop recalculates the second dimension automatically.
This approach is ideal for:
- Professional photography
- Print materials
- Marketing graphics
- High-resolution web images
Resizing Images for Websites
Website performance depends heavily on image optimization.
Large images can slow page loading times and increase bandwidth usage.
When resizing images for websites:
Blog Content
Recommended widths:
- 800–1200 px for standard content images
- 1200–1600 px for featured images
Product Images
Common sizes:
- 1000–2000 px on the longest side
Full-Width Banners
Typical widths:
- 1600–2500 px
Always maintain proportions to prevent visual distortion.
Resizing Images for Social Media
Different platforms have different image requirements.
The safest approach is to start with the recommended aspect ratio for the platform.
Examples include:
| Platform | Common Ratio |
|---|---|
| Instagram Feed | 1:1 or 4:5 |
| Facebook Post | 1.91:1 |
| LinkedIn Post | 1.91:1 |
| YouTube Thumbnail | 16:9 |
| Pinterest Pin | 2:3 |
If your image uses a different aspect ratio, you may need to crop it rather than stretch it.
Resize vs Crop: Understanding the Difference
These terms are often confused.
Resizing
Changes the dimensions of the entire image.
Nothing is removed.
Example:
- 3000 × 2000 becomes 1500 × 1000
All content remains visible.
Cropping
Removes parts of the image.
Example:
- Cutting off side areas to fit a square social media format.
Resizing preserves all image content, while cropping changes composition.
Sometimes both methods are used together.
How to Avoid Losing Image Quality
Resizing can affect image quality, especially when enlarging images.
To achieve the best results:
Reduce Size Rather Than Enlarge
Making an image smaller usually maintains quality.
Making it larger often introduces blur or pixelation.
Start with High-Resolution Files
Larger originals provide more flexibility when resizing.
Save in the Appropriate Format
Common formats include:
- JPEG for photographs
- PNG for graphics and transparency
- WebP for web optimization
- SVG for vector graphics
Avoid Repeated Resizing
Each save operation may slightly reduce quality, particularly with JPEG files.
Keep an original copy and generate resized versions from the source image.
Common Resizing Mistakes
Many image-quality issues come from a few simple mistakes.
Ignoring Aspect Ratio
This is the most common error.
The result is stretched or compressed images.
Enlarging Small Images Too Much
A small image cannot magically gain detail.
Excessive enlargement often causes visible pixelation.
Using Incorrect Export Settings
Very high compression can produce blurry or blocky images.
Resizing Multiple Times
Repeated editing may gradually reduce image quality.
Confusing Pixels with File Size
Pixel dimensions and file size are related but not identical.
An image can have:
- Large dimensions with efficient compression
- Small dimensions with a relatively large file size
Both factors should be considered when optimizing images.
Quick Aspect Ratio Formula
If you need to calculate dimensions manually:
New Height = Original Height × (New Width ÷ Original Width)
Or:
New Width = Original Width × (New Height ÷ Original Height)
Example
Original size:
- 2400 × 1600
Desired width:
- 1200
Calculation:
1200 ÷ 2400 = 0.5
New height:
1600 × 0.5 = 800
Result:
- 1200 × 800
The aspect ratio remains unchanged.
Practical Image Resizing Checklist
Before exporting a resized image, check the following:
- ✓ Aspect ratio is locked
- ✓ Only one dimension was changed manually
- ✓ Image is not stretched or compressed
- ✓ Resolution suits the intended use
- ✓ File format is appropriate
- ✓ Original file is preserved
- ✓ Final file size is reasonable
- ✓ Text and visual details remain clear
Following this checklist helps ensure consistent, professional results.
FAQs
Can I resize an image without losing quality?
Reducing image size generally causes little or no visible quality loss. Enlarging an image beyond its original dimensions often reduces sharpness and detail.
What happens if I don’t maintain aspect ratio?
The image becomes distorted. Subjects may appear stretched, compressed, wider, or taller than intended.
Is cropping better than resizing?
They serve different purposes. Resizing changes dimensions while keeping all content. Cropping removes parts of the image to fit a specific composition or aspect ratio.
Why does my image look blurry after resizing?
Blurriness often occurs when a small image is enlarged significantly or when aggressive compression settings are used during export.
What size should website images be?
The ideal size depends on the design and purpose of the image. For many websites, images between 800 and 1600 pixels wide provide a good balance between quality and performance.
Final Thoughts
Learning how to resize an image while keeping its proportions is a fundamental skill for anyone working with digital images. By maintaining the original aspect ratio, you preserve the image’s natural appearance, avoid distortion, and ensure professional-looking results across websites, social media platforms, presentations, and documents.
Whenever you resize an image, remember the simplest rule: adjust one dimension, keep the aspect ratio locked, and let the software calculate the other value automatically. This small step prevents most resizing problems and helps maintain image quality from start to finish.