How to Compare Original and Converted Images
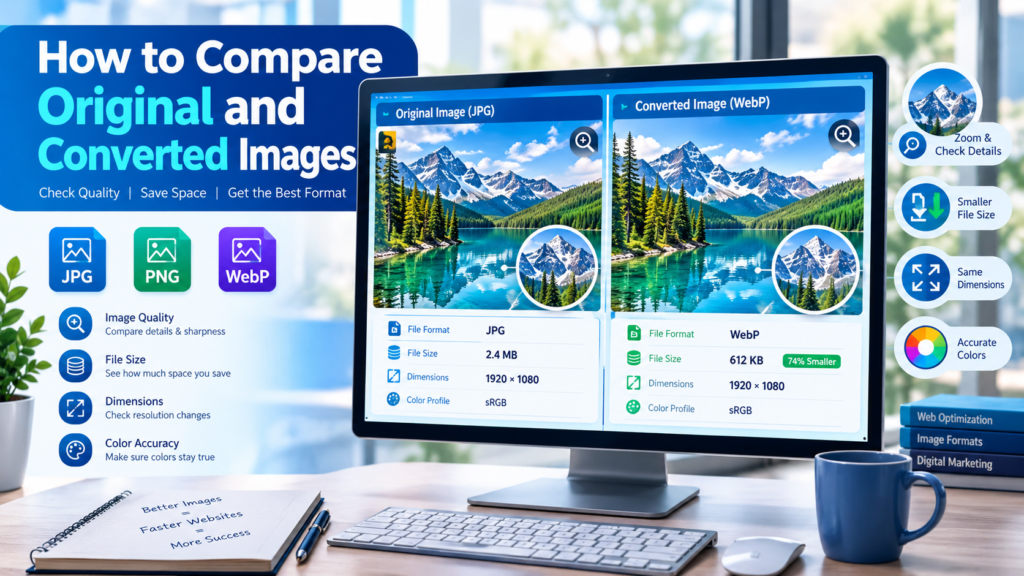
When you convert an image from one format to another, the new file may look identical at first glance, but important differences can exist beneath the surface. File size, image quality, dimensions, color accuracy, metadata, and compression levels can all change during conversion. The best way to compare original and converted images is to examine both visual quality and technical properties side by side. This helps you ensure that the conversion achieved the desired result without reducing image quality or introducing unwanted changes.
Whether you are converting JPG to PNG, PNG to WebP, HEIC to JPG, or any other format, knowing how to properly compare images can save storage space, improve website performance, and maintain visual quality.
Why Comparing Images After Conversion Matters
Many users assume that if two images look similar, they are identical. In reality, image conversion often changes important characteristics.
For example:
- A JPEG converted to WebP may be 30% to 50% smaller.
- A PNG converted to JPG may lose transparency.
- An image optimized for the web may reduce file size while slightly affecting quality.
- Metadata such as camera information or location data may be removed.
Comparing the original image with the converted version helps you determine whether the conversion meets your needs.
If you regularly convert images for websites, blogs, e-commerce stores, or social media, using a reliable tool like ImgConvert can simplify the process while preserving image quality.
What Should You Compare?
When evaluating original and converted images, focus on these key factors.
1. Visual Quality
The most obvious comparison is how the images look.
Check for:
- Blurriness
- Pix elation
- Color shifts
- Loss of detail
- Compression artifacts
- Text clarity
Zoom in to at least 100% and compare both images side by side.
Pay special attention to:
- Faces
- Text
- Logos
- Detailed textures
- Sharp edges
These areas often reveal quality loss more clearly.
2. File Size
One of the primary goals of image conversion is reducing file size.
Compare:
| Image | File Size |
|---|---|
| Original JPG | 4.2 MB |
| Converted WebP | 1.8 MB |
In this example, the converted image uses significantly less storage while maintaining similar quality.
Smaller file sizes can help:
- Improve website loading speed
- Reduce bandwidth usage
- Enhance user experience
- Improve SEO performance
Google’s PageSpeed recommendations emphasize optimizing images to improve web performance.
3. Image Dimensions
Dimensions refer to image width and height.
Example:
| Version | Dimensions |
|---|---|
| Original | 4000 × 3000 |
| Converted | 1920 × 1440 |
If dimensions were reduced during conversion, image quality may appear different despite using a modern format.
Always verify that the converted image matches your intended use.
4. Color Accuracy
Some image formats handle colors differently.
During conversion you may notice:
- Slight brightness changes
- Different color profiles
- Saturation adjustments
Professional photographers and designers should compare colors carefully to ensure consistency.
5. Transparency Support
Not every image format supports transparent backgrounds.
For example:
| Format | Transparency |
|---|---|
| PNG | Yes |
| WebP | Yes |
| JPG | No |
If you convert PNG to JPG, transparent areas will typically be replaced with a solid background color.
This is especially important when working with:
- Logos
- Icons
- Product images
- Graphic designs
Step-by-Step: How to Compare Original and Converted Images
Step 1: Open Both Images
Place the original and converted images side by side on your screen.
Most operating systems allow you to open multiple image viewers simultaneously.
Step 2: Zoom In
Look beyond the thumbnail view.
Inspect:
- Corners
- Fine lines
- Text
- Detailed patterns
Artifacts become much easier to identify when zoomed in.
Step 3: Compare File Information
Check file properties such as:
- File size
- Resolution
- Format
- Color depth
This information is available through your operating system’s file details panel.
Step 4: Examine Transparency
If your original image contains transparency, verify that the converted version preserves it.
Transparent images should display a checkerboard pattern in many editing applications.
Step 5: Test the Intended Use
Before finalizing the converted image:
- Upload it to your website
- Share it on social media
- Place it in a document
- Print it if necessary
Real-world testing often reveals issues that are not obvious during comparison.
Understanding Compression and Quality Loss
A common misconception is that image conversion always reduces quality.
This depends on the formats involved.
Lossless Conversion
Lossless formats preserve image data.
Examples include:
- PNG
- TIFF
- Some WebP settings
Quality remains nearly identical to the original.
Glossy Conversion
Glossy formats remove some image data to reduce file size.
Examples include:
- JPG
- AVIF (certain settings)
- WebP (glossy mode)
Quality loss may be invisible at normal viewing sizes, but repeated conversions can accumulate damage.
Constrain Proportions Meaning
Many users search for “constrain proportions meaning” when resizing images.
Constrain proportions is a setting that keeps an image’s original aspect ratio while resizing.
Simply put, when you change the width, the height automatically adjusts to maintain the same shape.
Example
Original image:
- Width: 2000 pixels
- Height: 1000 pixels
Aspect ratio:
- 2:1
If constrain proportions is enabled and you reduce width to 1000 pixels:
- New width: 1000 pixels
- New height: 500 pixels
The image keeps its original shape.
If constrain proportions is disabled and you change only the width:
- Width: 1000 pixels
- Height: 1000 pixels
The image becomes distorted because the aspect ratio changes.
Why It Matters
Keeping proportions constrained helps:
- Prevent stretching
- Avoid squashing
- Preserve professional appearance
- Maintain accurate image dimensions
Whenever possible, leave constrain proportions enabled when resizing photos or graphics.
You can easily resize images while maintaining their proportions using image conversion and editing tools available through platforms such as ImgConvert.
Common Image Comparison Mistakes
Comparing at Different Zoom Levels
Always compare images using the same zoom percentage.
Different zoom levels can create a misleading impression of quality.
Ignoring Metadata Changes
Metadata may contain:
- Camera settings
- Creation dates
- GPS information
- Copyright information
Some conversions remove metadata automatically.
Judging Quality by File Size Alone
Smaller files are not always better.
An overly compressed image may have:
- Blurry areas
- Visible artifacts
- Reduced text sharpness
Balance file size and quality carefully.
Multiple Repeated Conversions
Repeatedly converting between glossy formats can progressively reduce image quality.
For example:
JPG → PNG → JPG → WebP
Each glossy stage introduces additional compression.
Whenever possible, keep the original file and create new versions from it.
Best Formats for Different Purposes
JPG
Best for:
- Photographs
- Blog images
- Social media photos
Advantages:
- Small file sizes
- Wide compatibility
Limitations:
- No transparency
- Glossy compression
PNG
Best for:
- Logos
- Graphics
- Transparent images
Advantages:
- Lossless quality
- Transparency support
Limitations:
- Larger file sizes
WebP
Best for:
- Websites
- Online stores
- Landing pages
Advantages:
- Excellent compression
- Transparency support
- Better web performance
Limitations:
- Slightly limited support in older software
AVIF
Best for:
- Modern websites
- Maximum compression efficiency
Advantages:
- Very small file sizes
- High-quality output
Limitations:
- Not universally supported in every application
Using ImgConvert to Compare and Optimize Images
ImgConvert provides a simple way to convert images between popular formats.
Useful workflows include:
- JPG to PNG conversion
- PNG to JPG conversion
- WebP optimization
- Image resizing
- Format comparison
After conversion, compare:
- Visual quality
- File size
- Dimensions
- Transparency
- Compression effects
This helps ensure you achieve the right balance between image quality and performance.
If you’re optimizing website images, you may also find these guides useful:
- JPG vs PNG: Which Image Format Is Better?
- How to Convert PNG to WebP Without Losing Quality
- Best Image Formats for Faster Website Loading
- How to Resize Images While Maintaining Aspect Ratio
- WebP vs AVIF: Which Format Should You Choose?
These related topics can help you build a complete image optimization strategy while improving internal linking and user engagement across your website.
Quick Image Comparison Checklist
Before replacing an original image with a converted version, verify:
✅ Visual quality remains acceptable
✅ Important details are preserved
✅ File size is reduced as intended
✅ Dimensions are correct
✅ Colors remain accurate
✅ Transparency is preserved if needed
✅ Metadata requirements are met
✅ The image performs well in its intended environment
Following this checklist can prevent unexpected quality issues and ensure the converted image is ready for professional use.
FAQs
Can a converted image look identical to the original?
Yes. Many conversions produce visually identical results, especially when using lossless formats or high-quality compression settings. Technical properties such as file size and metadata may still differ.
Does converting PNG to JPG reduce quality?
Potentially. PNG uses lossless compression, while JPG uses glossy compression. Depending on the quality settings, some detail may be lost.
Why is my converted image smaller?
The converter may use more efficient compression or a format designed to reduce file size while preserving visual quality.
What does constrain proportions mean when resizing an image?
It means the image keeps its original aspect ratio. When width changes, height adjusts automatically, preventing distortion.
Should I delete the original image after conversion?
It’s generally best to keep the original file. This allows you to create future versions without repeatedly compressing already converted images.
Final Thoughts
Comparing original and converted images involves more than checking whether they look the same. A proper comparison includes visual quality, file size, dimensions, transparency, color accuracy, and metadata. By reviewing these elements carefully, you can choose the best image format for your specific needs while avoiding unnecessary quality loss.
Before publishing converted images on your website, blog, or online store, take a few moments to compare the results. A quick review can help you maintain professional image quality while benefiting from smaller file sizes and improved performance. Tools like ImgConvert make the conversion process simple, but understanding how to evaluate the results is what ensures the best final outcome.